Roblox Ragdoll Script: Physics State and Constraints
Physics state changes how a Humanoid controls movement. A constraint-based ragdoll changes how the limbs connect. Use both deliberately: build the joint setup, then hand control from Motor6D animation to physics. The example below toggles a server-owned NPC in an experience you own.
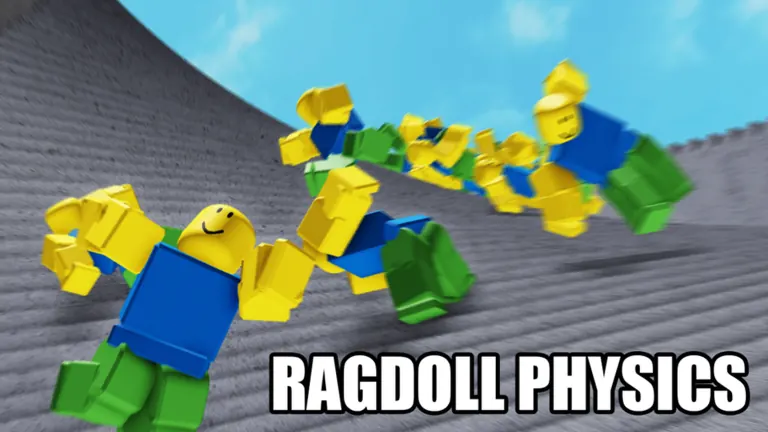
Physics state is not a complete ragdoll
HumanoidStateType.Physics is the manual physics-control state: the Humanoid does not supply its own movement force or automatically switch itself to another state. Existing Motor6D joints still connect the limbs, so a character can enter Physics and remain stiff. A script must explicitly choose the transition back, such as GettingUp.
The current official enum documentation marks the older Ragdoll state as deprecated. Selecting that state does not create correctly placed attachments, limb colliders or anatomical limits. This guide uses Physics with an explicit constraints setup, keeping those responsibilities visible.
Prepare the NPC and joint bindings
Use a Humanoid NPC Model with an unanchored HumanoidRootPart. Add a ProximityPrompt to that root part for the demonstration. This example controls an NPC rather than replacing Roblox's player input or camera scripts. Keep the root motor connected so the invisible root remains attached to the torso.
For each limb Motor6D to release, author two Attachments on its Part0 and Part1 and place them at the same intended joint point. Put a BallSocketConstraint named RagdollSocket under that Motor6D and assign the two attachments. Start with the motor enabled and the socket disabled. The constraint may be parented under the motor while its attachments live on the physical parts.
Configure BallSocketConstraint swing and twist limits for the particular joint. Turn LimitsEnabled and TwistLimitsEnabled on where limits are required, and author UpperAngle, TwistLowerAngle and TwistUpperAngle in the rig. A free ball socket is a useful connection, but it does not impose an elbow's hinge behavior; choose a hinge when that is the intended articulation.
- Place matching attachments. Orient and position the paired attachments in Studio. Both should describe the same joint in world space while using their own parent-part coordinates.
- Keep the root assembly connected. Leave the HumanoidRootPart-to-torso motor outside the RagdollSocket bindings, and keep the root collision disabled.
- Author collision relationships. Set limb collision so the NPC contacts the world; exclude inappropriate adjacent-body collisions with collision groups or NoCollisionConstraint.
- Add the server Script. Place the following Script inside the NPC Model. The server handles prompt activation, network ownership and the motor/constraint swap.
Minimal server-owned NPC toggle
The script deliberately uses constraints that you authored. It does not invent joint coordinates, anatomical limit values or collider sizes. It checks that bindings have attachments and start in the expected animated state. When active, Motor6Ds stop controlling the selected joints and BallSocketConstraints hold those limbs together.
SetNetworkOwner(nil) keeps simulation authority on the server for this NPC mechanism. Roblox notes that server ownership can feel less responsive to clients; use the ownership policy appropriate to your game rather than applying it indiscriminately to every player-controlled character.
-- Server Script inside an NPC Model in Workspace.
-- Rig setup: for every Motor6D to release, add a child
-- BallSocketConstraint named RagdollSocket with authored attachments.
-- Leave the root motor connected. All NPC parts must be unanchored.
local rig = script.Parent
local humanoid = rig:WaitForChild("Humanoid")
local prompt = rig:WaitForChild("HumanoidRootPart")
    :WaitForChild("ProximityPrompt")

local bindings = {}
for _, item in rig:GetDescendants() do
    if item:IsA("Motor6D") then
        local socket = item:FindFirstChild("RagdollSocket")
        if socket and socket:IsA("BallSocketConstraint") then
            assert(socket.Attachment0 and socket.Attachment1,
                "Author both socket attachments first")
            assert(item.Enabled and not socket.Enabled,
                "Start with motor enabled and socket disabled")
            table.insert(bindings, {motor = item, socket = socket})
        end
    end
end
assert(#bindings > 0, "No authored ragdoll joints were found")

local originalRotate = humanoid.AutoRotate
local originalNeck = humanoid.RequiresNeck
local originalBreak = humanoid.BreakJointsOnDeath
-- Keep the head attached through its socket when the neck motor stops.
humanoid.RequiresNeck = false
humanoid.BreakJointsOnDeath = false

local function ownOnServer()
    for _, item in rig:GetDescendants() do
        if item:IsA("BasePart") and not item.Anchored then
            local allowed = item:CanSetNetworkOwnership()
            if allowed then item:SetNetworkOwner(nil) end
        end
    end
end

local active = false
local function setRagdoll(enabled)
    if enabled == active or humanoid.Health <= 0 then return end
    active = enabled
    if enabled then
        ownOnServer()
        humanoid.AutoRotate = false
        for _, binding in bindings do
            binding.socket.Enabled = true
            binding.motor.Enabled = false
        end
        -- Motors are released; Physics state alone does not do that.
        humanoid:ChangeState(Enum.HumanoidStateType.Physics)
    else
        for _, binding in bindings do
            binding.socket.Enabled = false
            binding.motor.Enabled = true
        end
        humanoid.AutoRotate = originalRotate
        humanoid:ChangeState(Enum.HumanoidStateType.GettingUp)
    end
end

-- Server-owned NPC demonstration; no RemoteEvent trusts client part names.
prompt.Triggered:Connect(function()
    setRagdoll(not active)
end)

-- RequiresNeck / BreakJointsOnDeath intentionally remain configured for
-- this NPC while the script runs. A reusable controller should restore
-- originalNeck / originalBreak when it is removed from a living rig.
Why the neck, collisions and restoration matter
Disabling the neck Motor6D can cause a Humanoid with RequiresNeck enabled to die. The script sets RequiresNeck to false and keeps BreakJointsOnDeath false so a constraint-based setup can retain the intended physical connections. These settings belong to the NPC controller's lifecycle; preserve their original values if a reusable system later detaches from a living character.
The example restores motors and requests GettingUp on a second prompt activation. A polished recovery still needs root placement, pose selection and a clear decision about when locomotion resumes. The snippet does not contain a death-respawn system. Its Health check leaves death handling to that separate system.
Use the rig's collision editor to confirm that limbs can hit the floor. Root and accessory colliders should not fight the torso. If adjacent parts overlap at a shared joint, a NoCollisionConstraint for that pair can prevent a contact solver from pushing against the very joint that connects them.
Adding a player F key without surrendering authority
F is a familiar key from the Skydiving experience, but this NPC prompt does not bind that key globally. For your own playable character, put input handling in a LocalScript, send a toggle request through a RemoteEvent, and let a server Script decide whether the request is valid. The server should resolve the requesting player's current character itself rather than accepting an arbitrary Model or body part from the client.
Use a server-side cooldown and state checks appropriate to the mechanic. Keep the camera, movement controller and network ownership policy coordinated with the ragdoll transition. Some Humanoid state changes depend on which machine owns the assembly, so simply moving the NPC code into a LocalScript is not a multiplayer architecture.
Troubleshooting the transition
| Symptom | Inspect | Reason |
|---|---|---|
| Physics state but rigid pose | Motor6D.Enabled and matching socket bindings | Changing a state does not release the joints |
| Head disappears or Humanoid dies | RequiresNeck and the head constraint | A disabled neck motor needs an intentional neck policy |
| Limbs separate | Attachment0 / Attachment1 and their parent parts | A constraint needs the correct pair of physical attachment frames |
| Body jitters at joints | Adjacent collision and attachment alignment | Contacts can fight the joint connection |
| Whole rig does not fall | Anchored parts and collision setup | An anchored body can pin the mechanism |
| Different clients see different motion | Network ownership and which machine changes state | Simulation ownership affects authority and responsiveness |
What this example is for
This is an original, readable setup pattern for a project you control. It does not expose Frobulate's implementation or modify Havoc, Skydiving or another creator's running experience. Use the linked game pages to compare controls and identity; use official Creator Hub APIs to build your own physical character.
Questions people actually ask
Is there a free Roblox ragdoll script here?
Yes. The server Script above shows an original NPC toggle using your own authored Motor6D and BallSocketConstraint bindings. The rig preparation is part of the example.
Physics state or Ragdoll state?
This example uses Physics for the manual Humanoid handover and constraints for the actual articulation. A state selection alone does not build the ragdoll.
Does the example work on R6 and R15 automatically?
It works from explicit joint bindings rather than a hard-coded bone-name list. R6 and R15 still need their own attachments, colliders and appropriate joint limits.
Why use a server-owned NPC?
It makes the authority boundary explicit for this small example. Player-controlled characters need a coordinated input, network ownership and recovery design.
Can I restore the character after ragdoll?
The example reverses the motor/constraint swap and requests GettingUp. A smooth production recovery additionally aligns the locomotion root and blends into a suitable recovery pose.
Keep going
Sources
- Roblox Creator Hub: HumanoidStateType — checked 2026-11-02
- Roblox Creator Hub: Humanoid — checked 2026-11-02
- Roblox Creator Hub: BallSocketConstraint — checked 2026-11-02
- Roblox Creator Hub: Motor6D — checked 2026-11-02
- Roblox Creator Hub: network ownership — checked 2026-11-02
- Roblox Creator Hub: NoCollisionConstraint — checked 2026-11-02
- Roblox Creator Hub: remote events and callbacks — checked 2026-11-02